-40%
EPEVER WiFi 2.4G to Cloud Adapter APP for MPPT Solar Charge Controller
$ 15.83
- Description
- Size Guide
Description
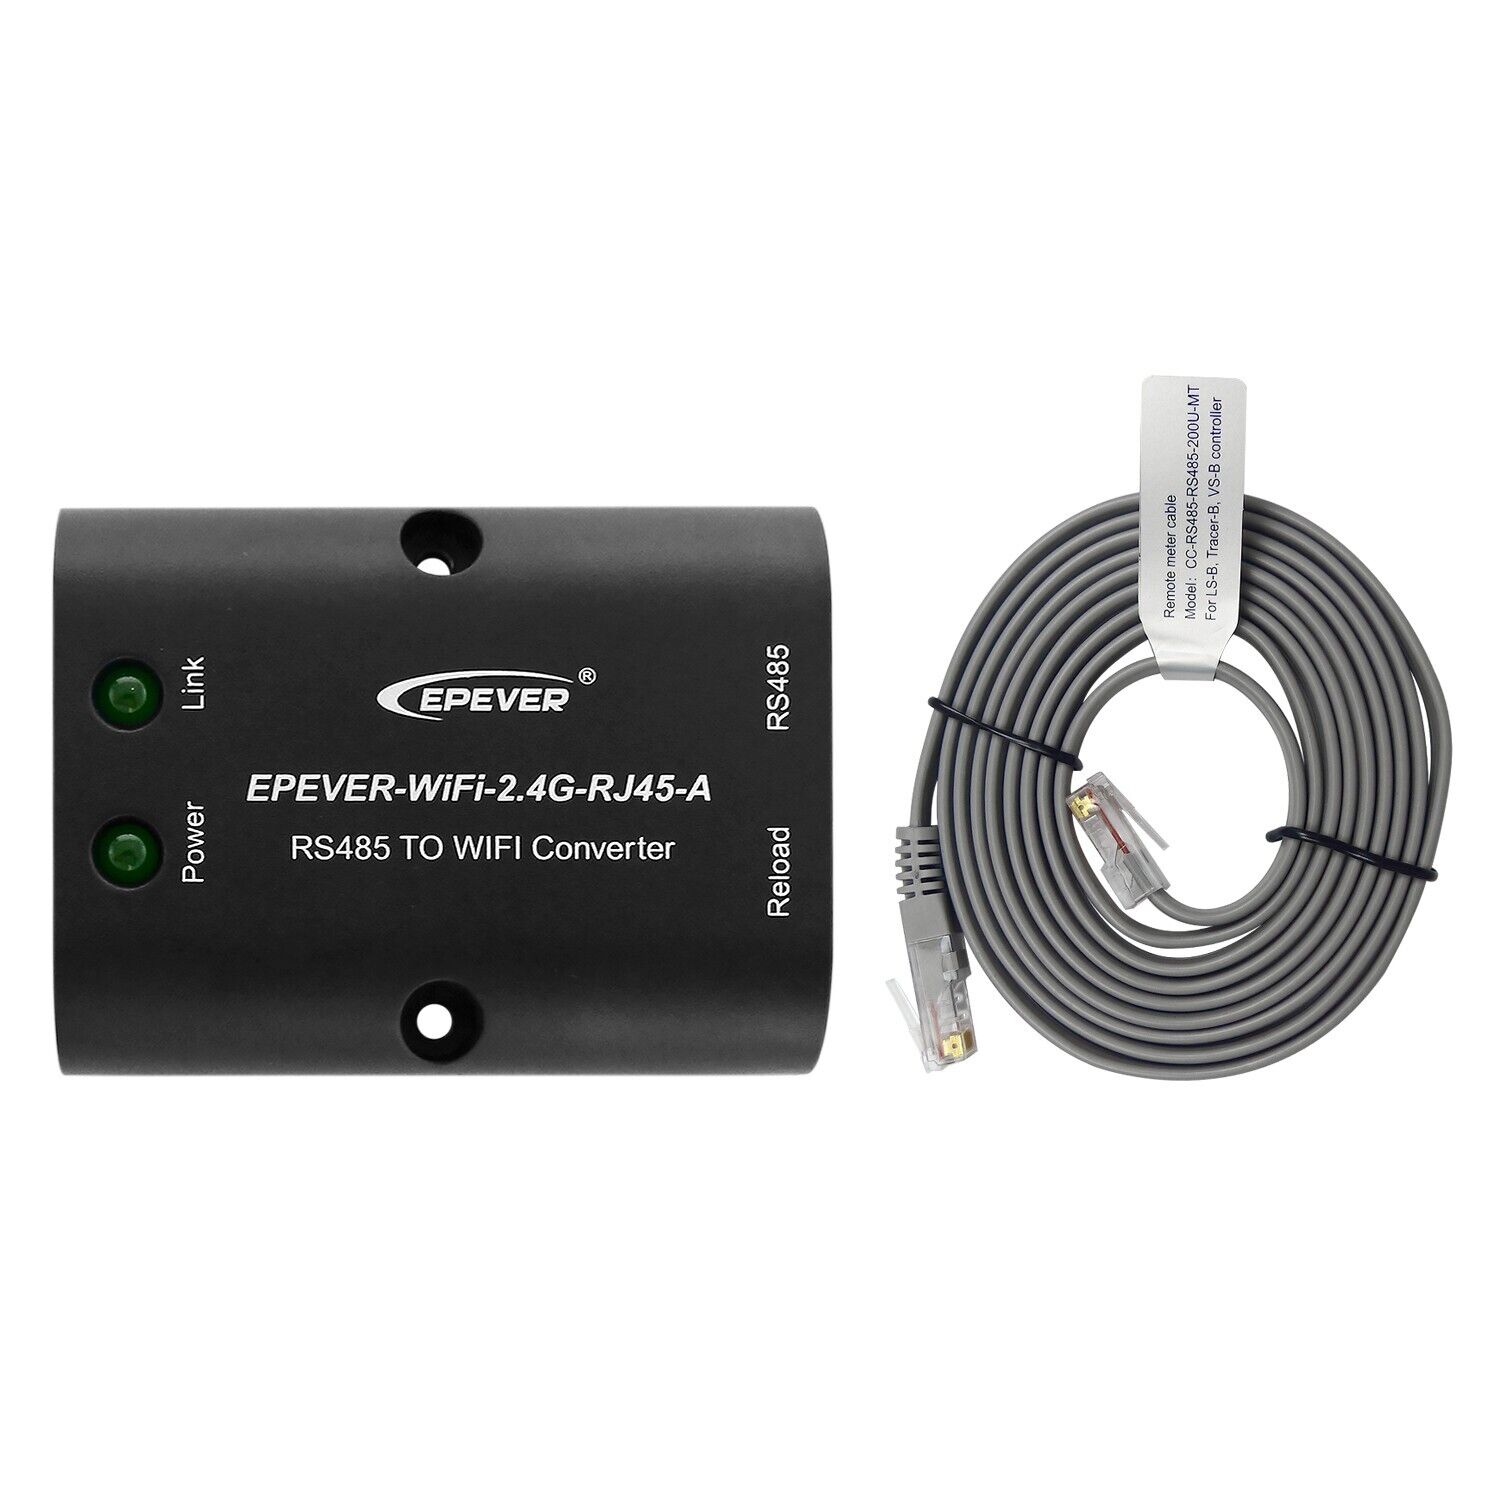
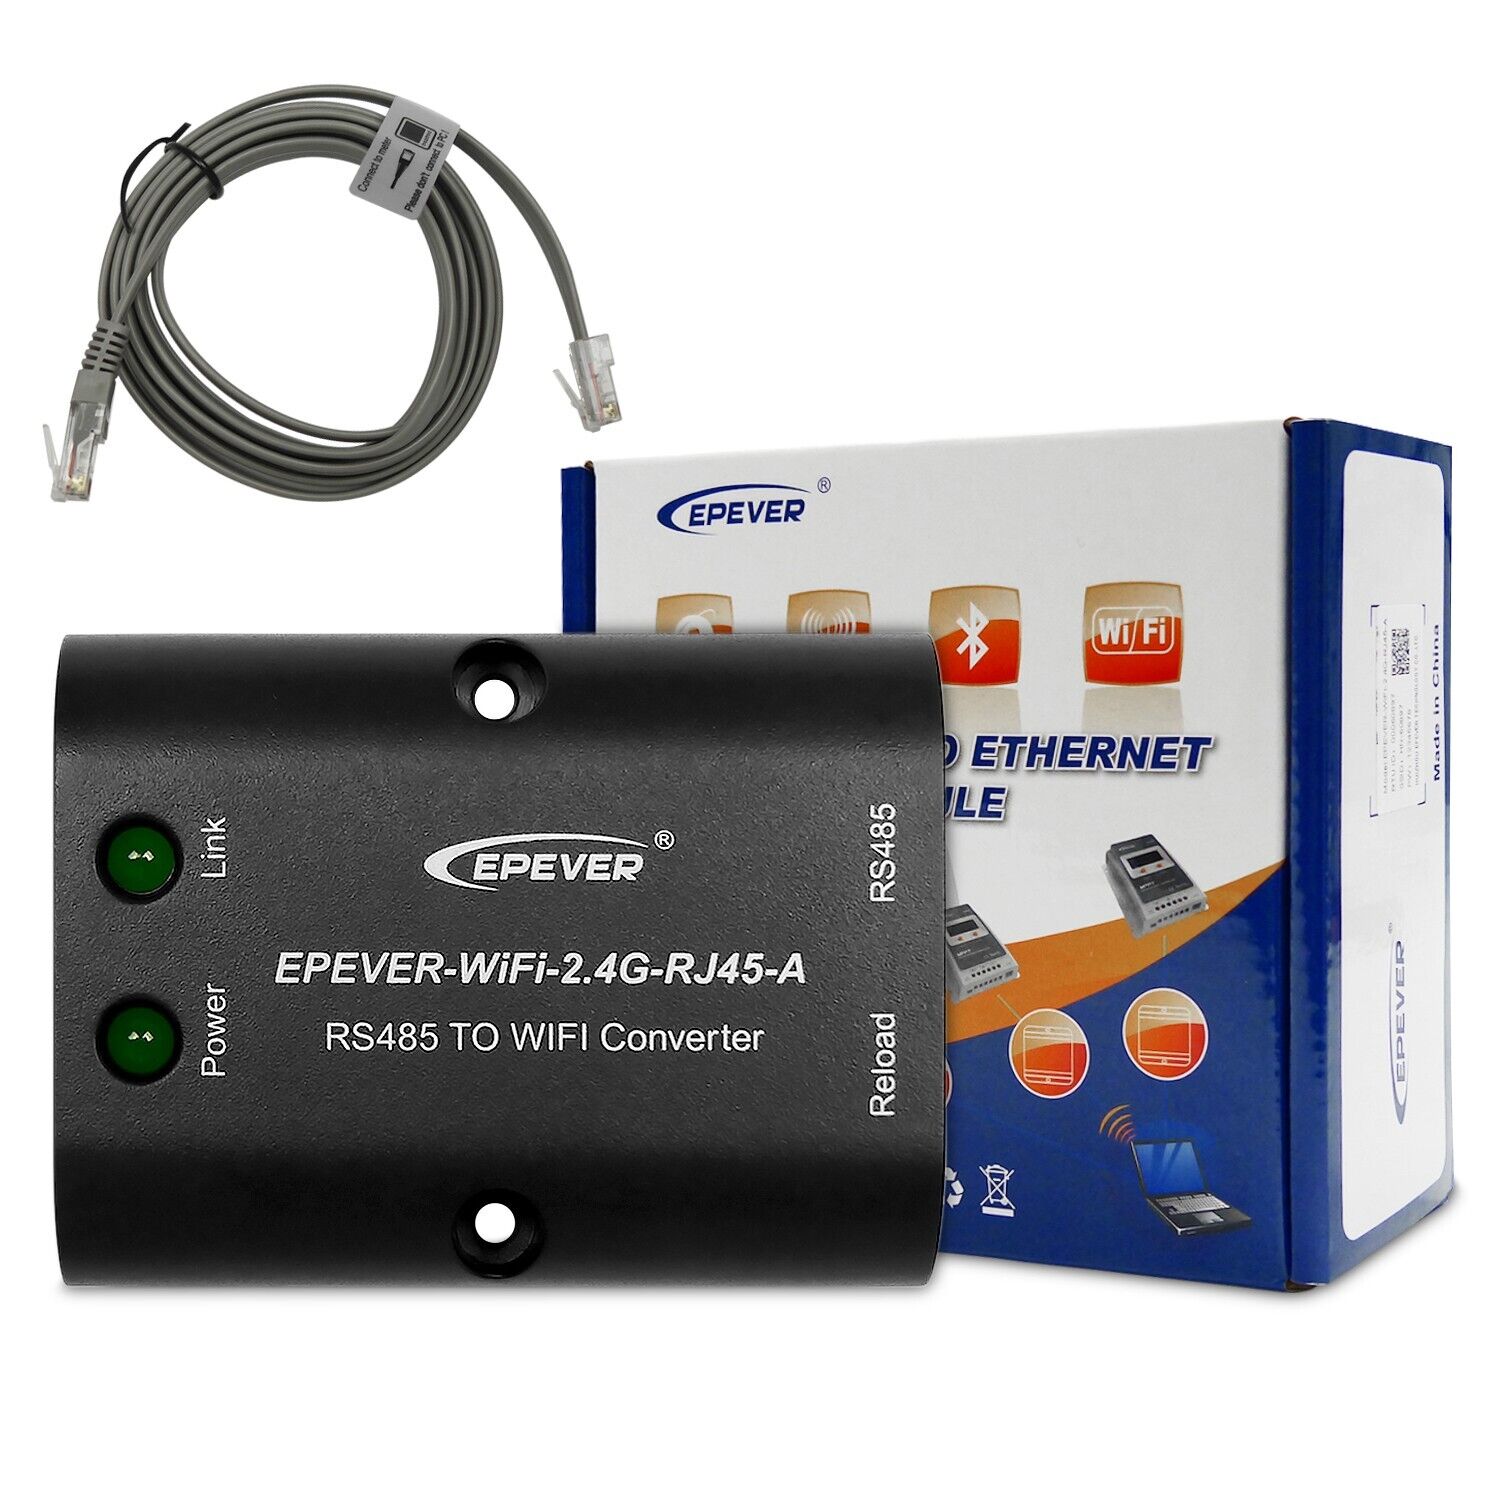
☆2022 updated version EPEVER WiFi remote adapter via Please search "EPEVER Pair" in App Store to download.☆ There is a local 2.4G WiFi network. The WiFi terminal can automatically upload the collected data to the EPEVER cloud.
☆This eBox WLAN is only for reading out and setting up solar system data and cannot be connected to the home internet WLAN. We have a manual in the box, please read it carefully.
☆ If you need to use the "EPEVER Cloud" feature, please make sure to give me the “HN_xxxxx” code of your product. This way I can add your device to the cloud system.
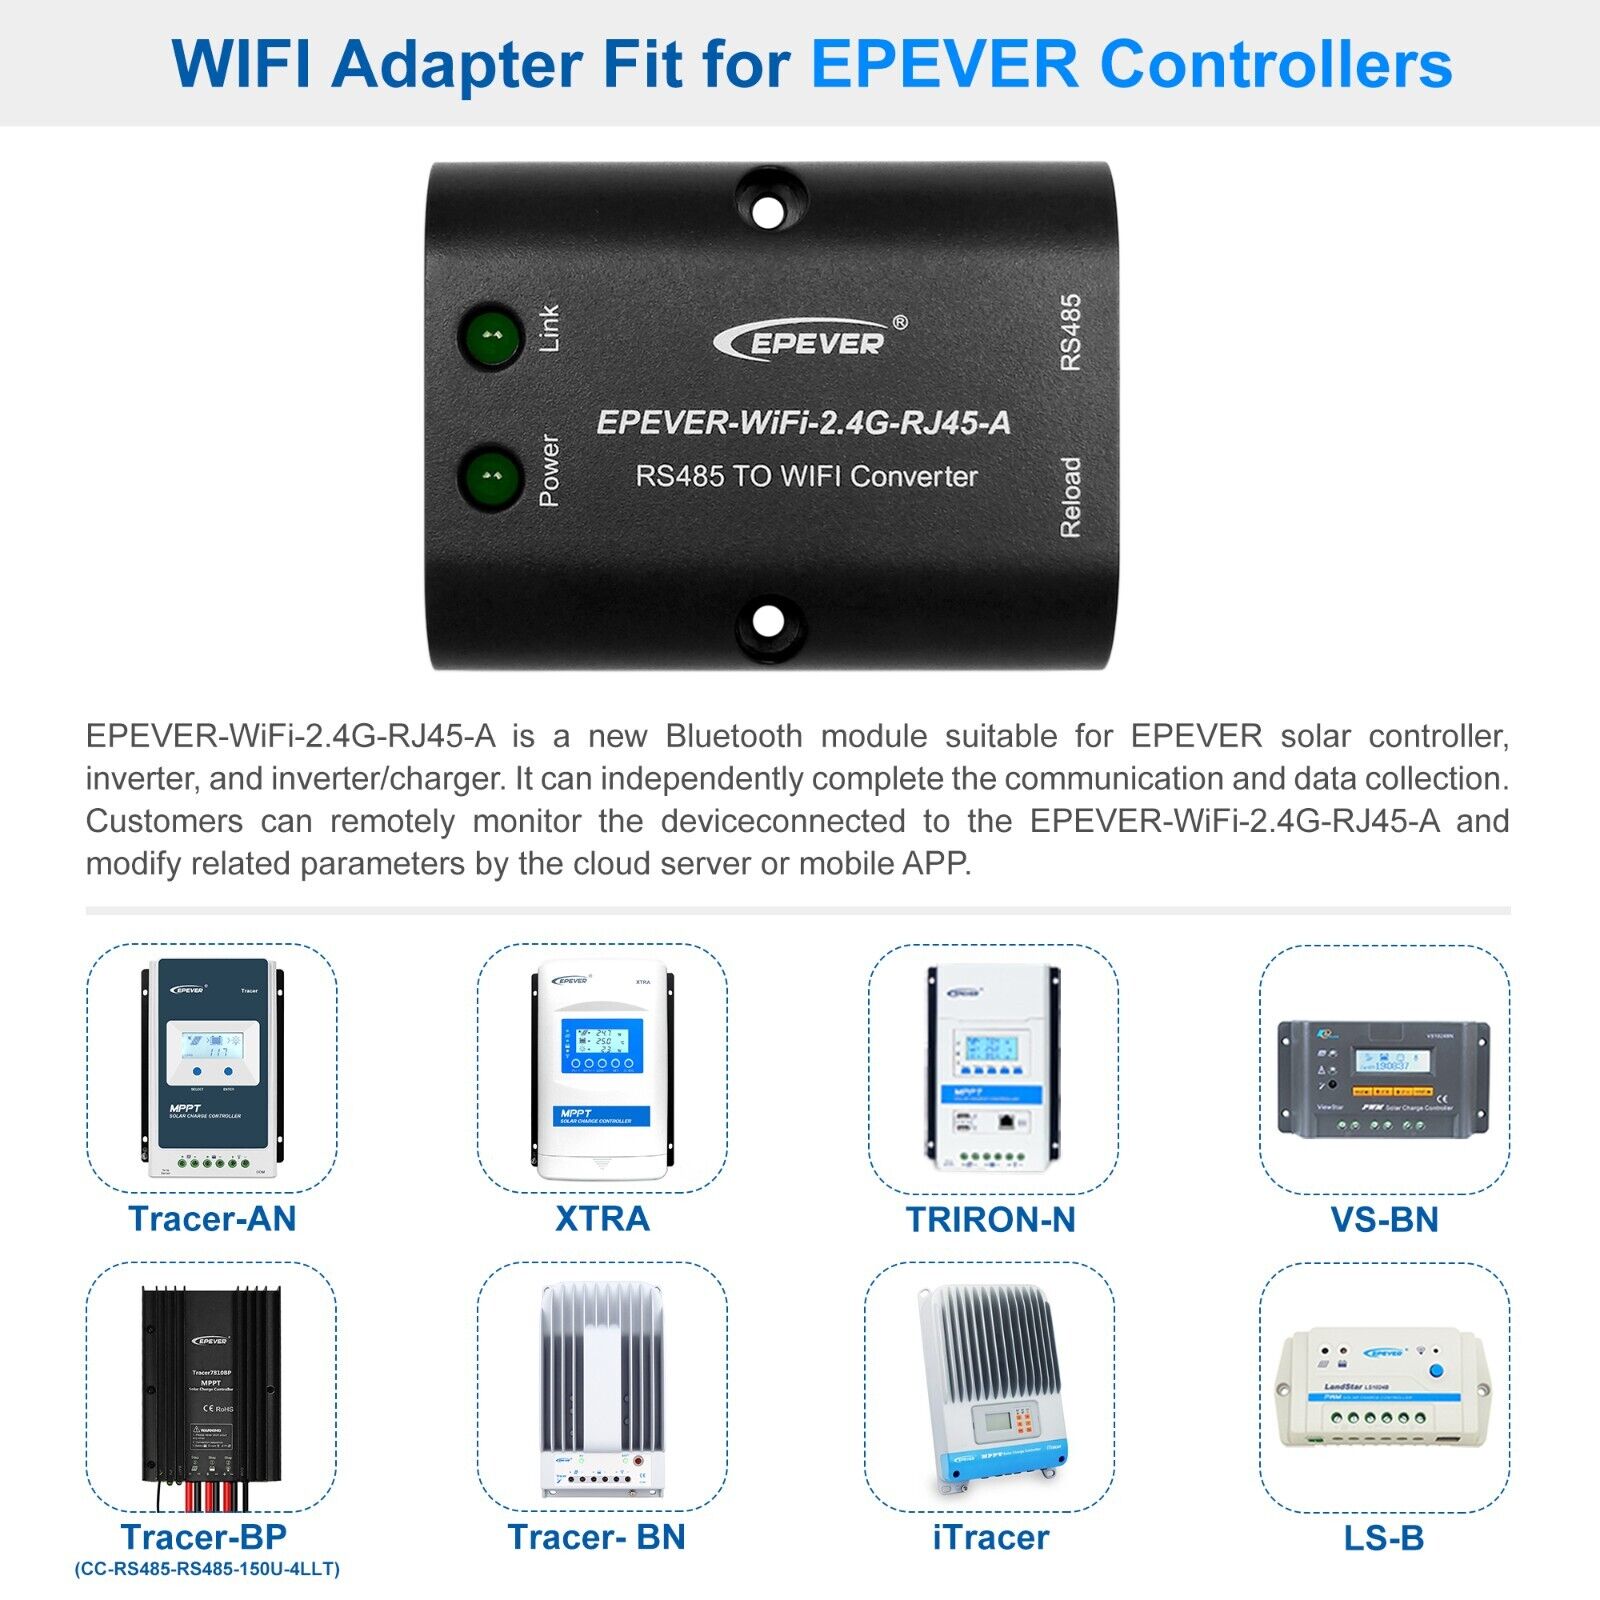
☆ Suitable for EPEVER brand: Tracer-AN series, Tracer-BN series, Triron-N series, XTRA-N series, LS-B series, VS-AU series, VS-BN series, SHI series, STI series, eTracer-AD series, eTracer-BND series, iTracer-ND series.
Technical Data:
Model: EPEVER-WiFi-2.4G-RJ45-A
Input voltage: 5 V DC (directly controlled by RS485 interface)
Power consumption in standby mode: 0.20 W ,Current consumption: 0.25 W
Communication range: ≤ 50 m
Port baud rate: 300 bps ~ 230400 bps (115200 standard)
Communication: RS485 to WLAN
Interface: RJ45
Connection cable: standard network cable (parallel cable)
Overall dimensions: 66.24x 51.28 x 23.76mm
Mounting dimension: 41.2mm
Mounting hole size: Φ3.2 mm
Operating temperature: -35 ~ 75 °C
Protection class: IP54
Net weight: 37 g
Note:
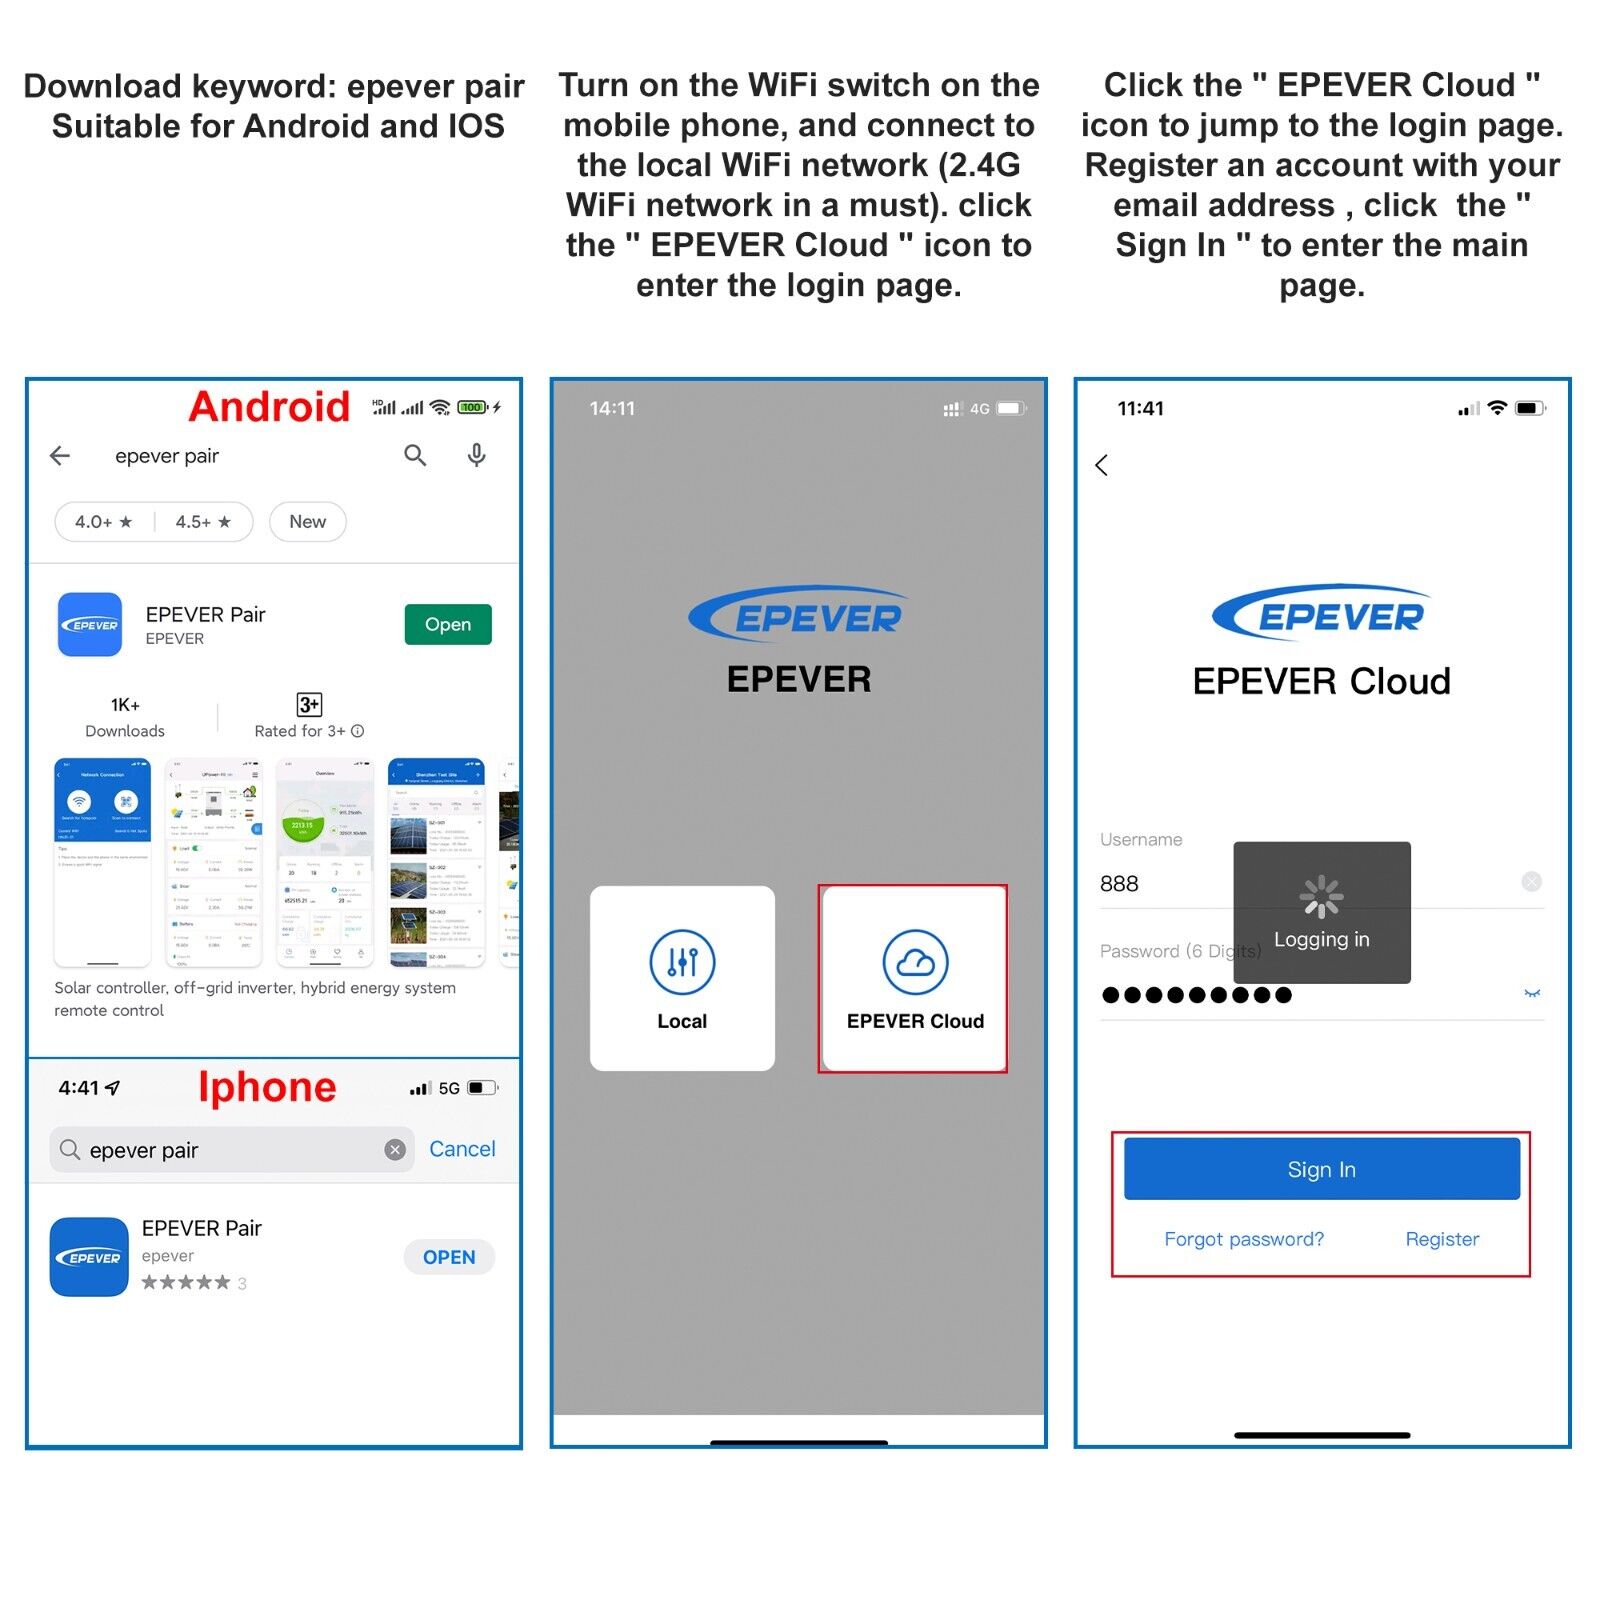
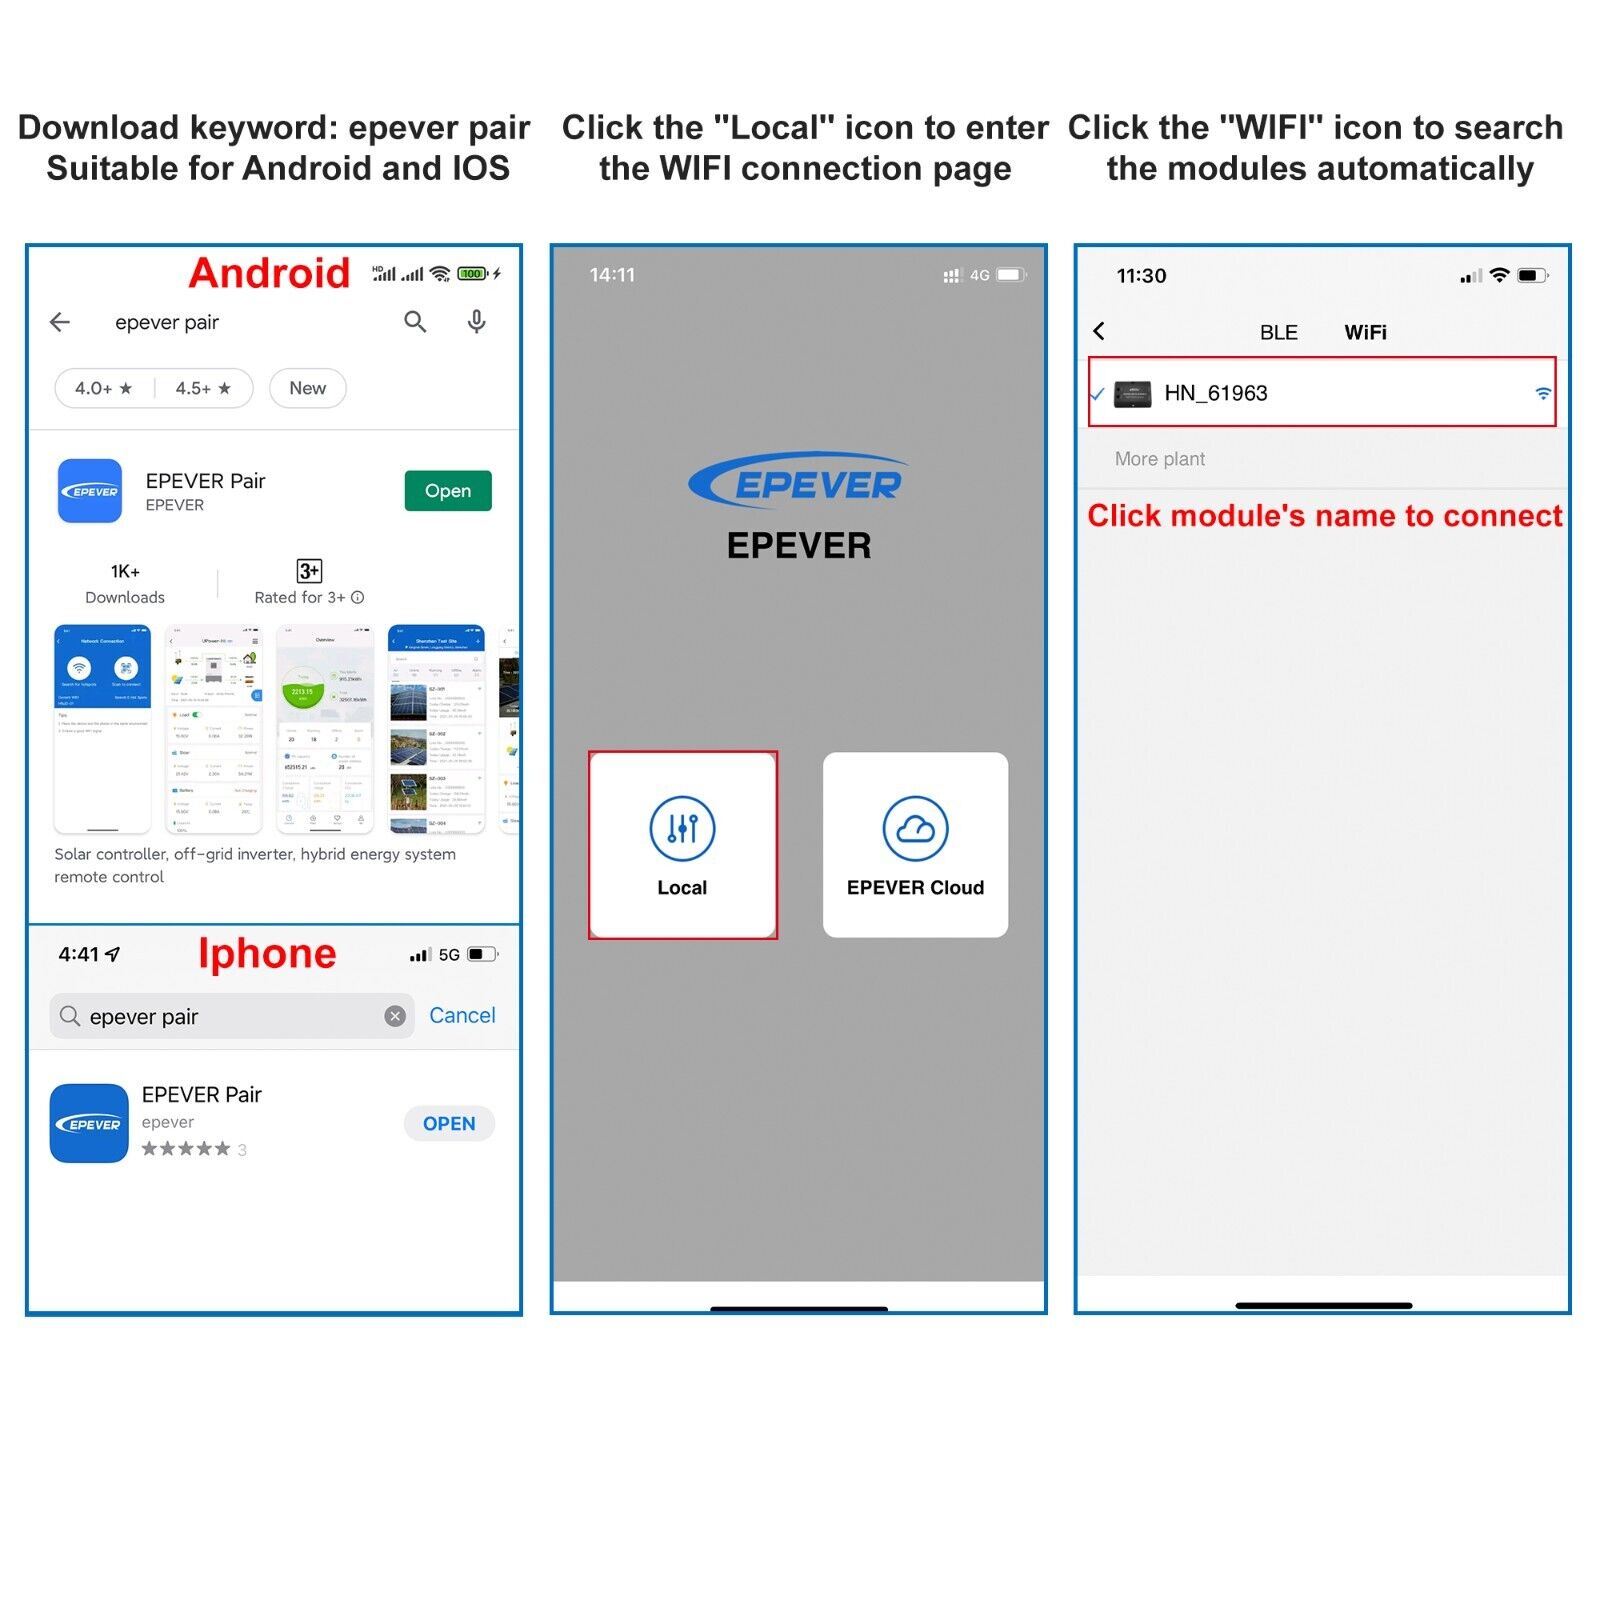
Please search: "EPEVERP air" in APP store and Google Play (iOS & Andriod are the same keyword).
With the new function "WiFi on Cloud", the signal reception may not be stable.
Suggestions and comments about the new features are welcome and will be accepted via email.
“Local” connection
Download the APP "EPEVER Pair".
Turn on the WiFi switch on the cell phone, then go to the APP.
Click "Local" and select the EPEVER WiFi 2.4G RJ45-A signal "HN_xxxxx", wait until the "WIFI" icon appears above the phone to indicate successful connection.
Return to the app and click "HN_xxxxx", then wait for the device to connect.
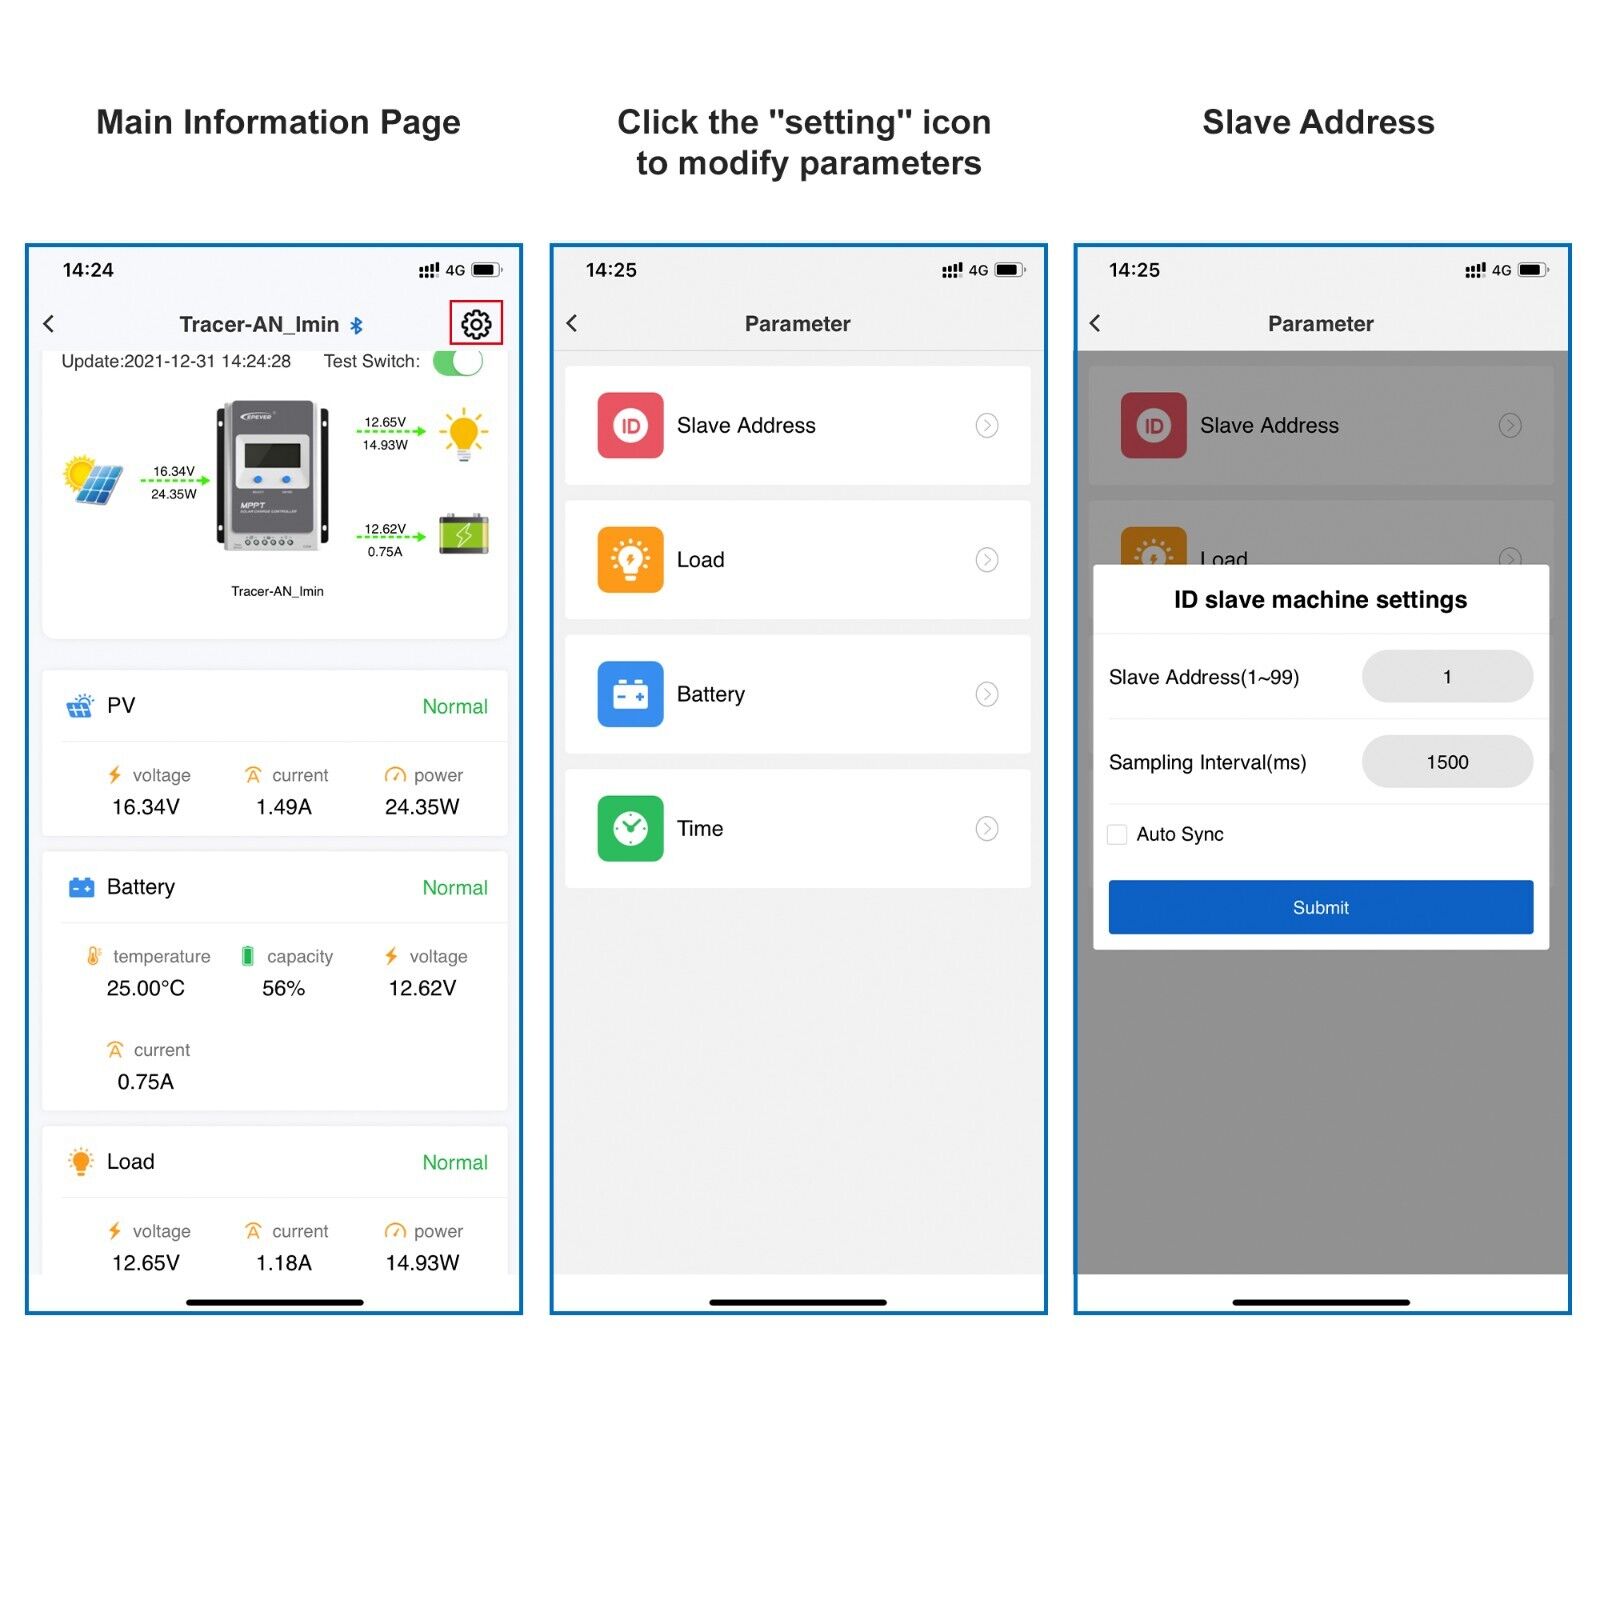
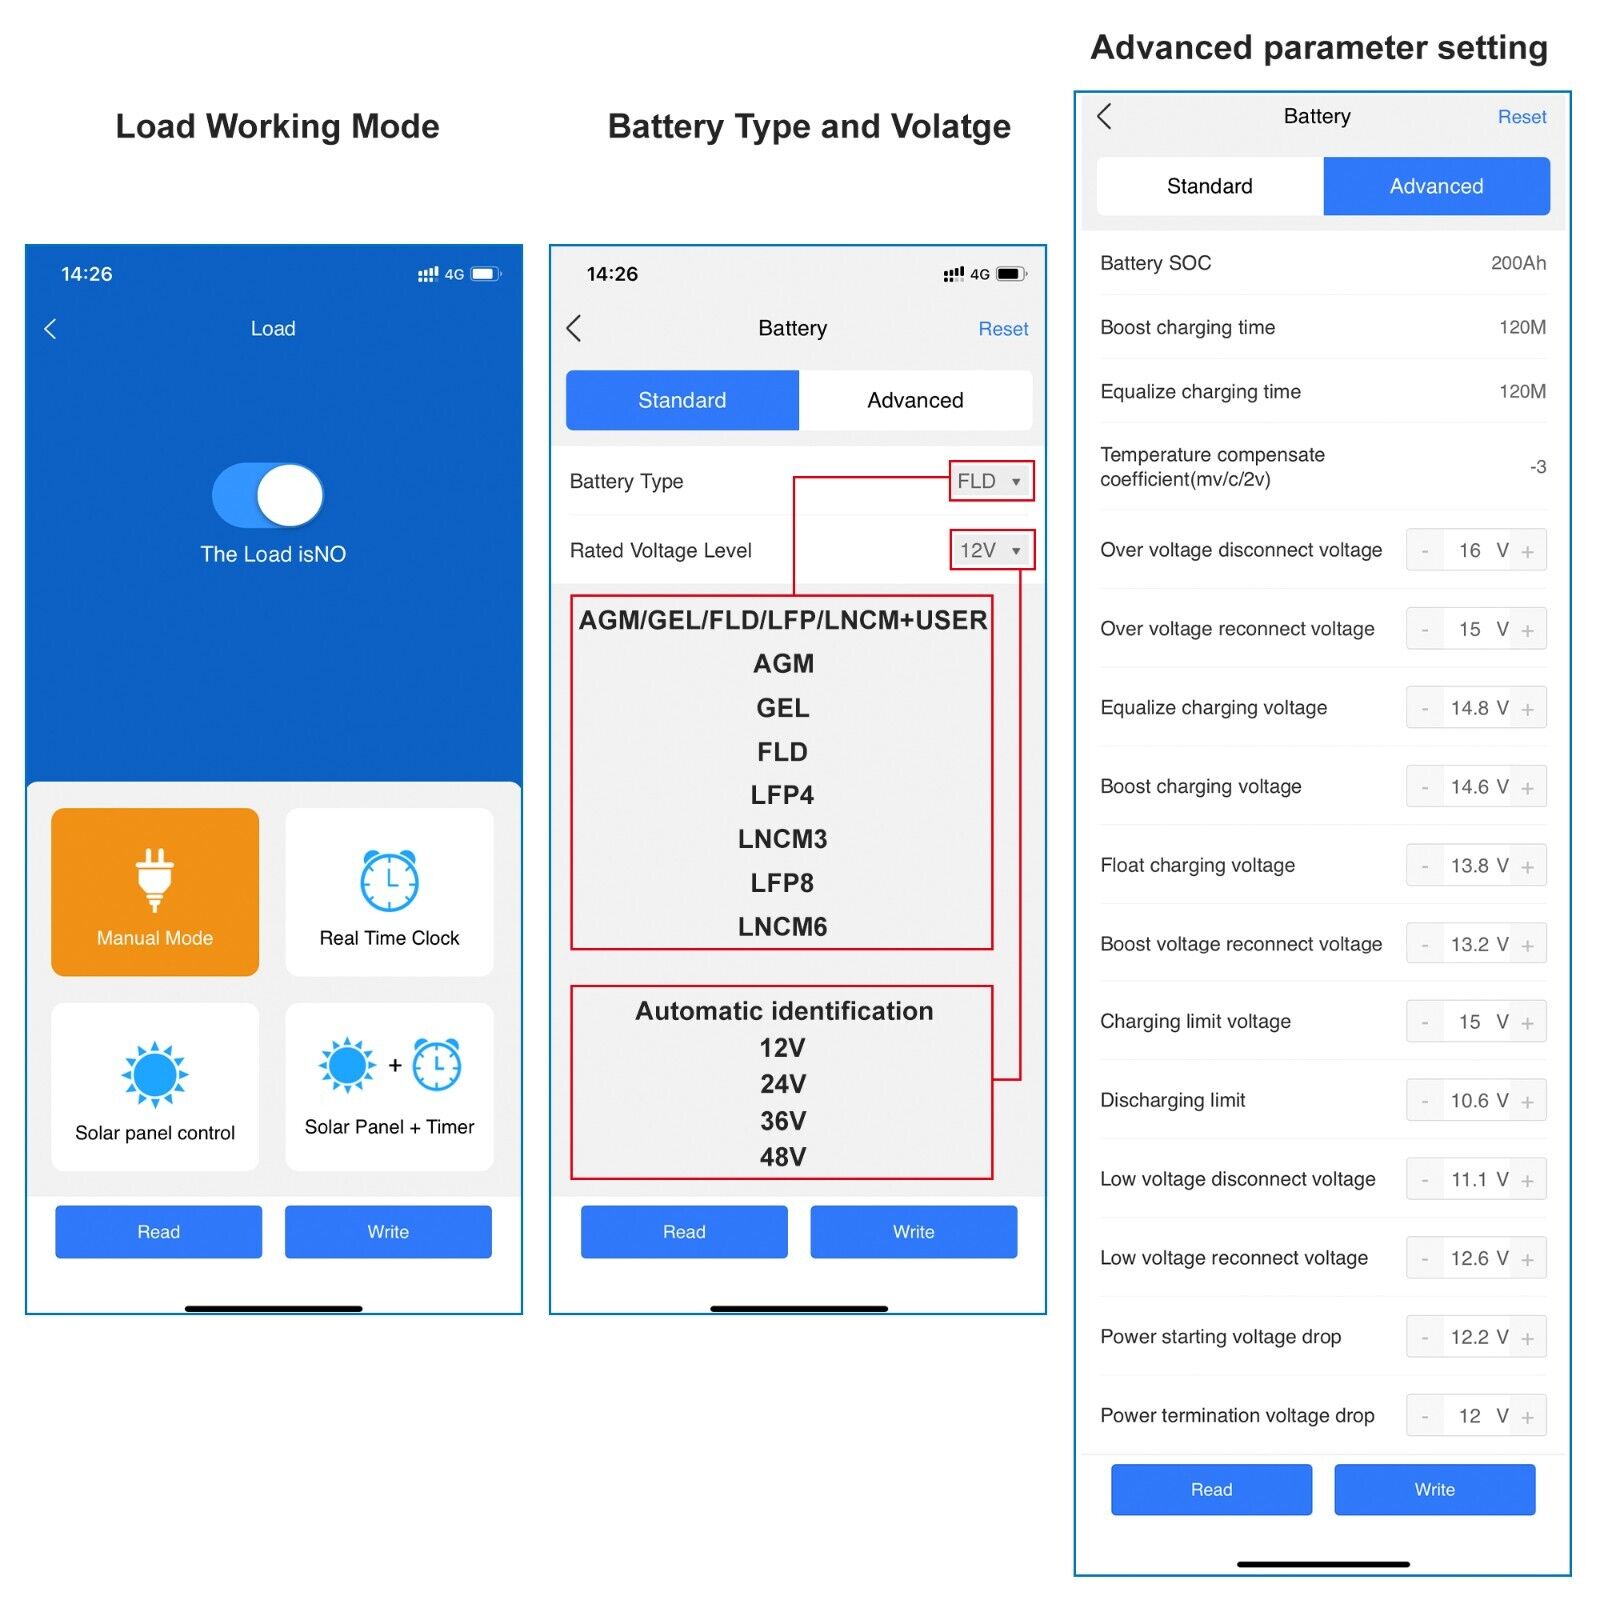
After successful connection, the solar system parameters will be read automatically. On the main page you can control the load.
"WiFi on Cloud" connecting steps. Please send us the code "HN_xxxxx" before you link to Cloud. Thank you!
Step 1:
Turn on the WiFi switch on the mobile phone, and connect to the local WiFi network
(2.4G WiFi network in a must)
. click the " EPEVER Cloud " icon to enter the login page.
Step 2:
Click the " EPEVER Cloud " icon to jump to the login page. Register an account with your email address , click the " Sign In " to enter the main page.
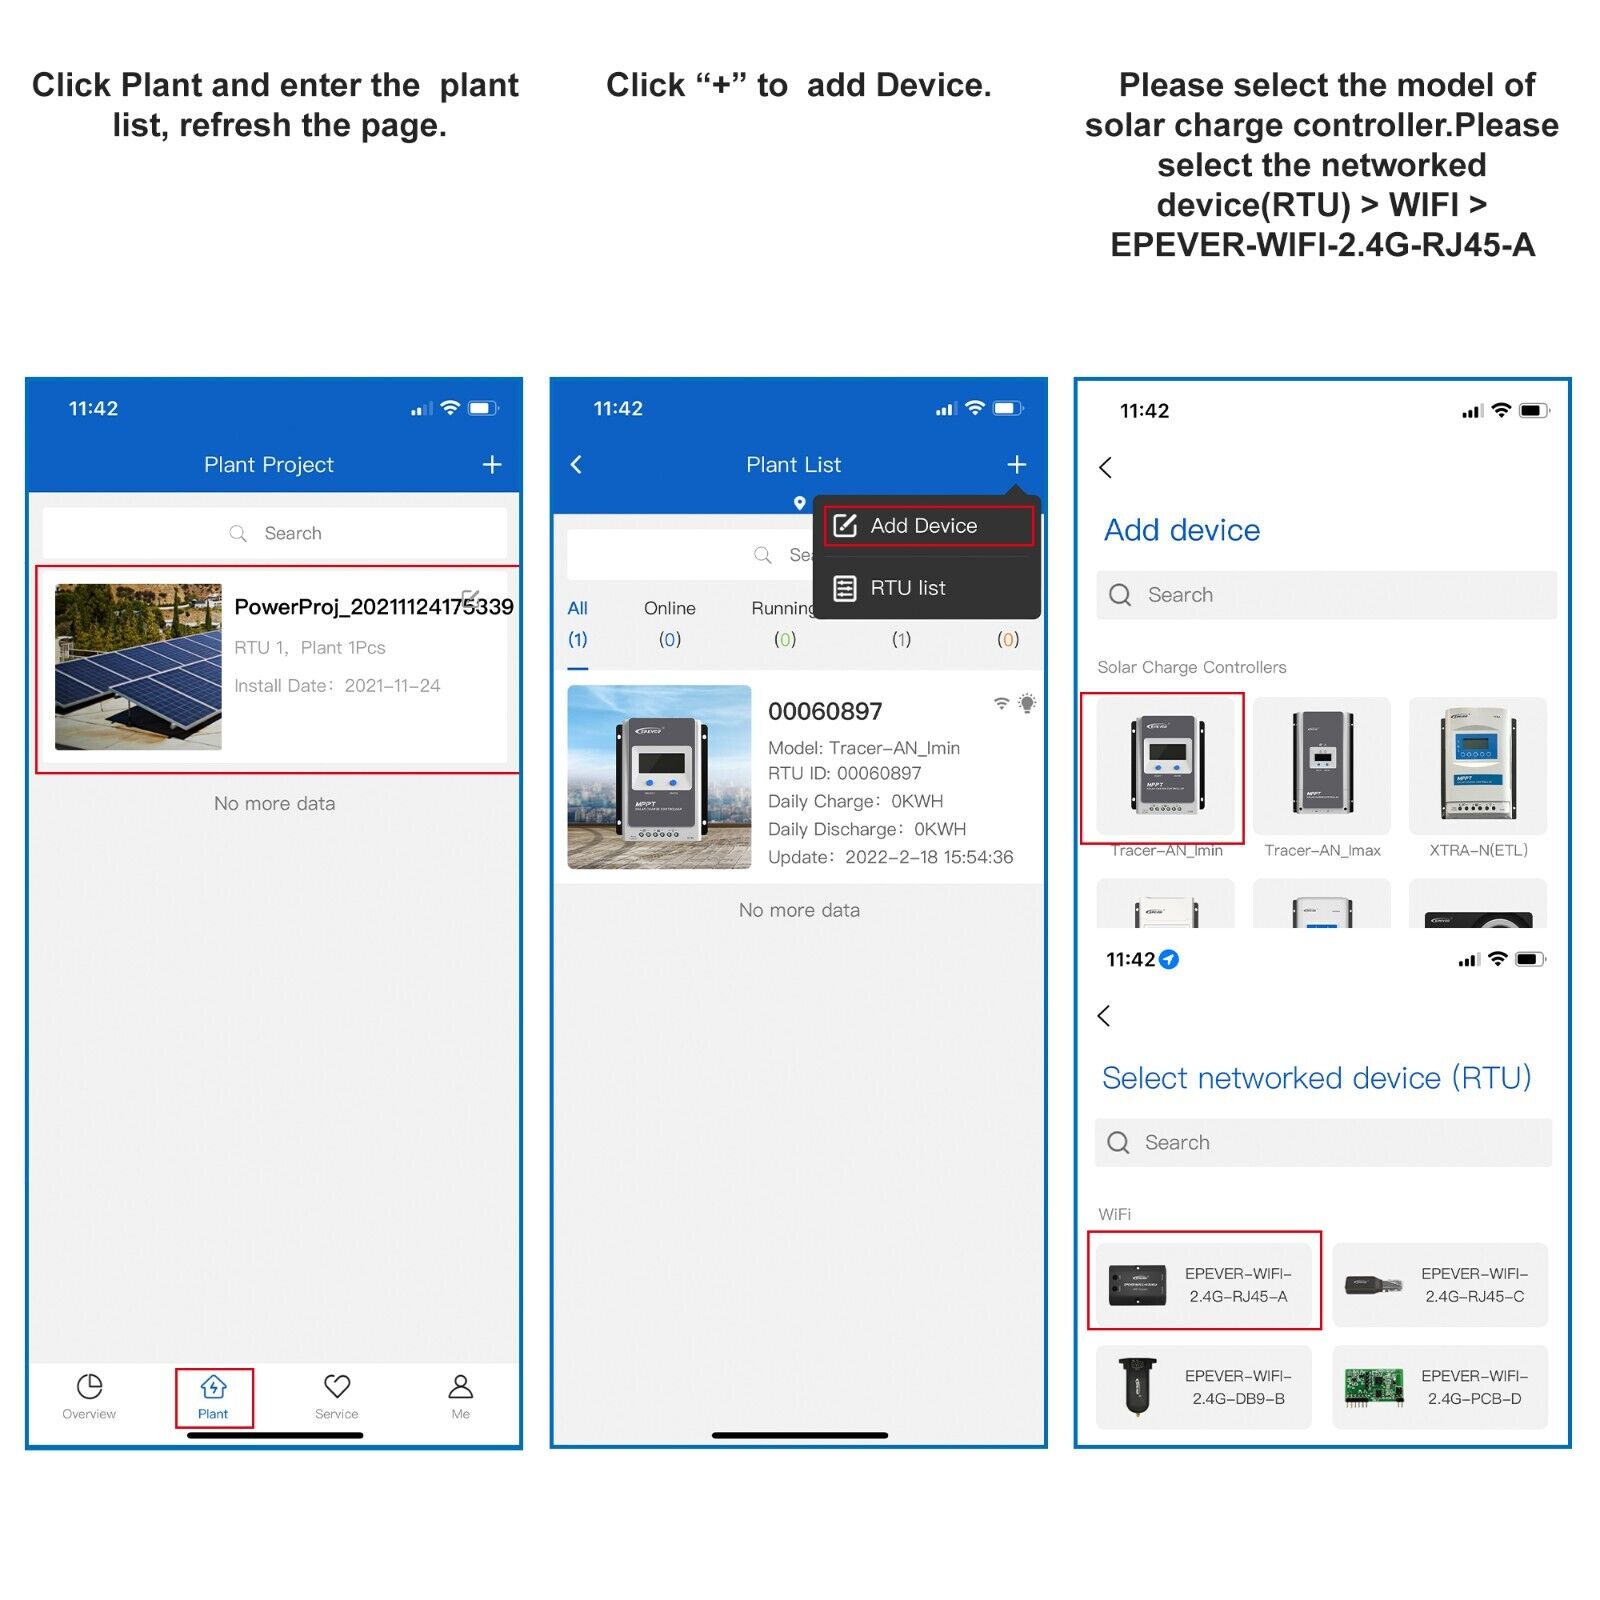
Step 3:
Click “Plant” and enter the plant list, refresh the page.
Step 4:
Click “+” to add Device.
Step 5:
Please select the model of solar charge controller.
Step 6:
Please select the networked device(RTU) > WIFI >EPEVER-WIFI-2.4G-RJ45-A.
Step 7:
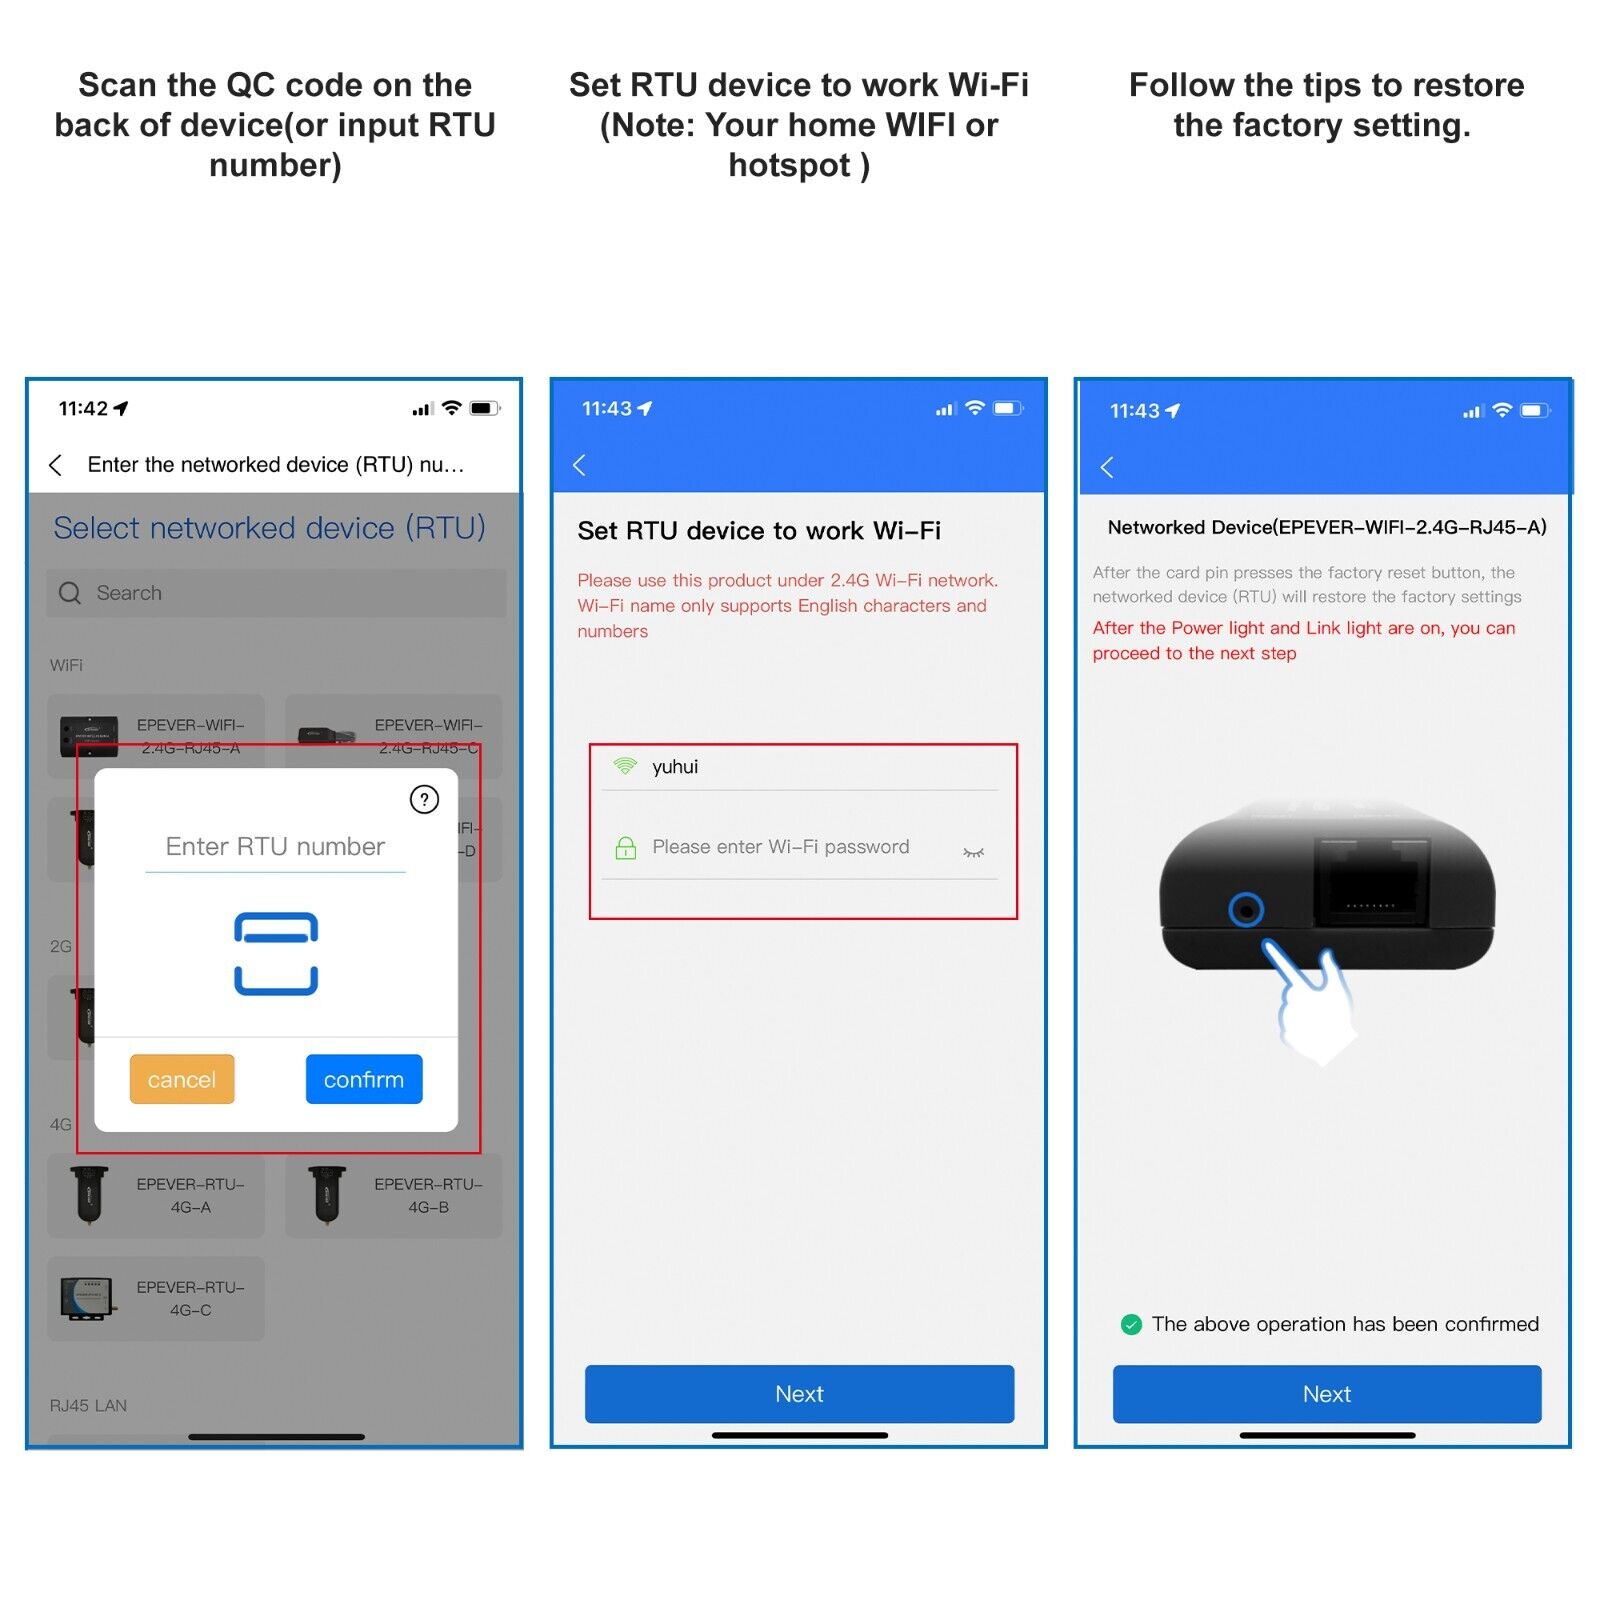
Scan the QC code on the back of device(or input RTU number.
Step 8:
Set RTU device to work Wi-Fi (Note: Your home WIFI or hotspot ).
Step 9:
Follow the tips to restore the factory setting.
Step 10:
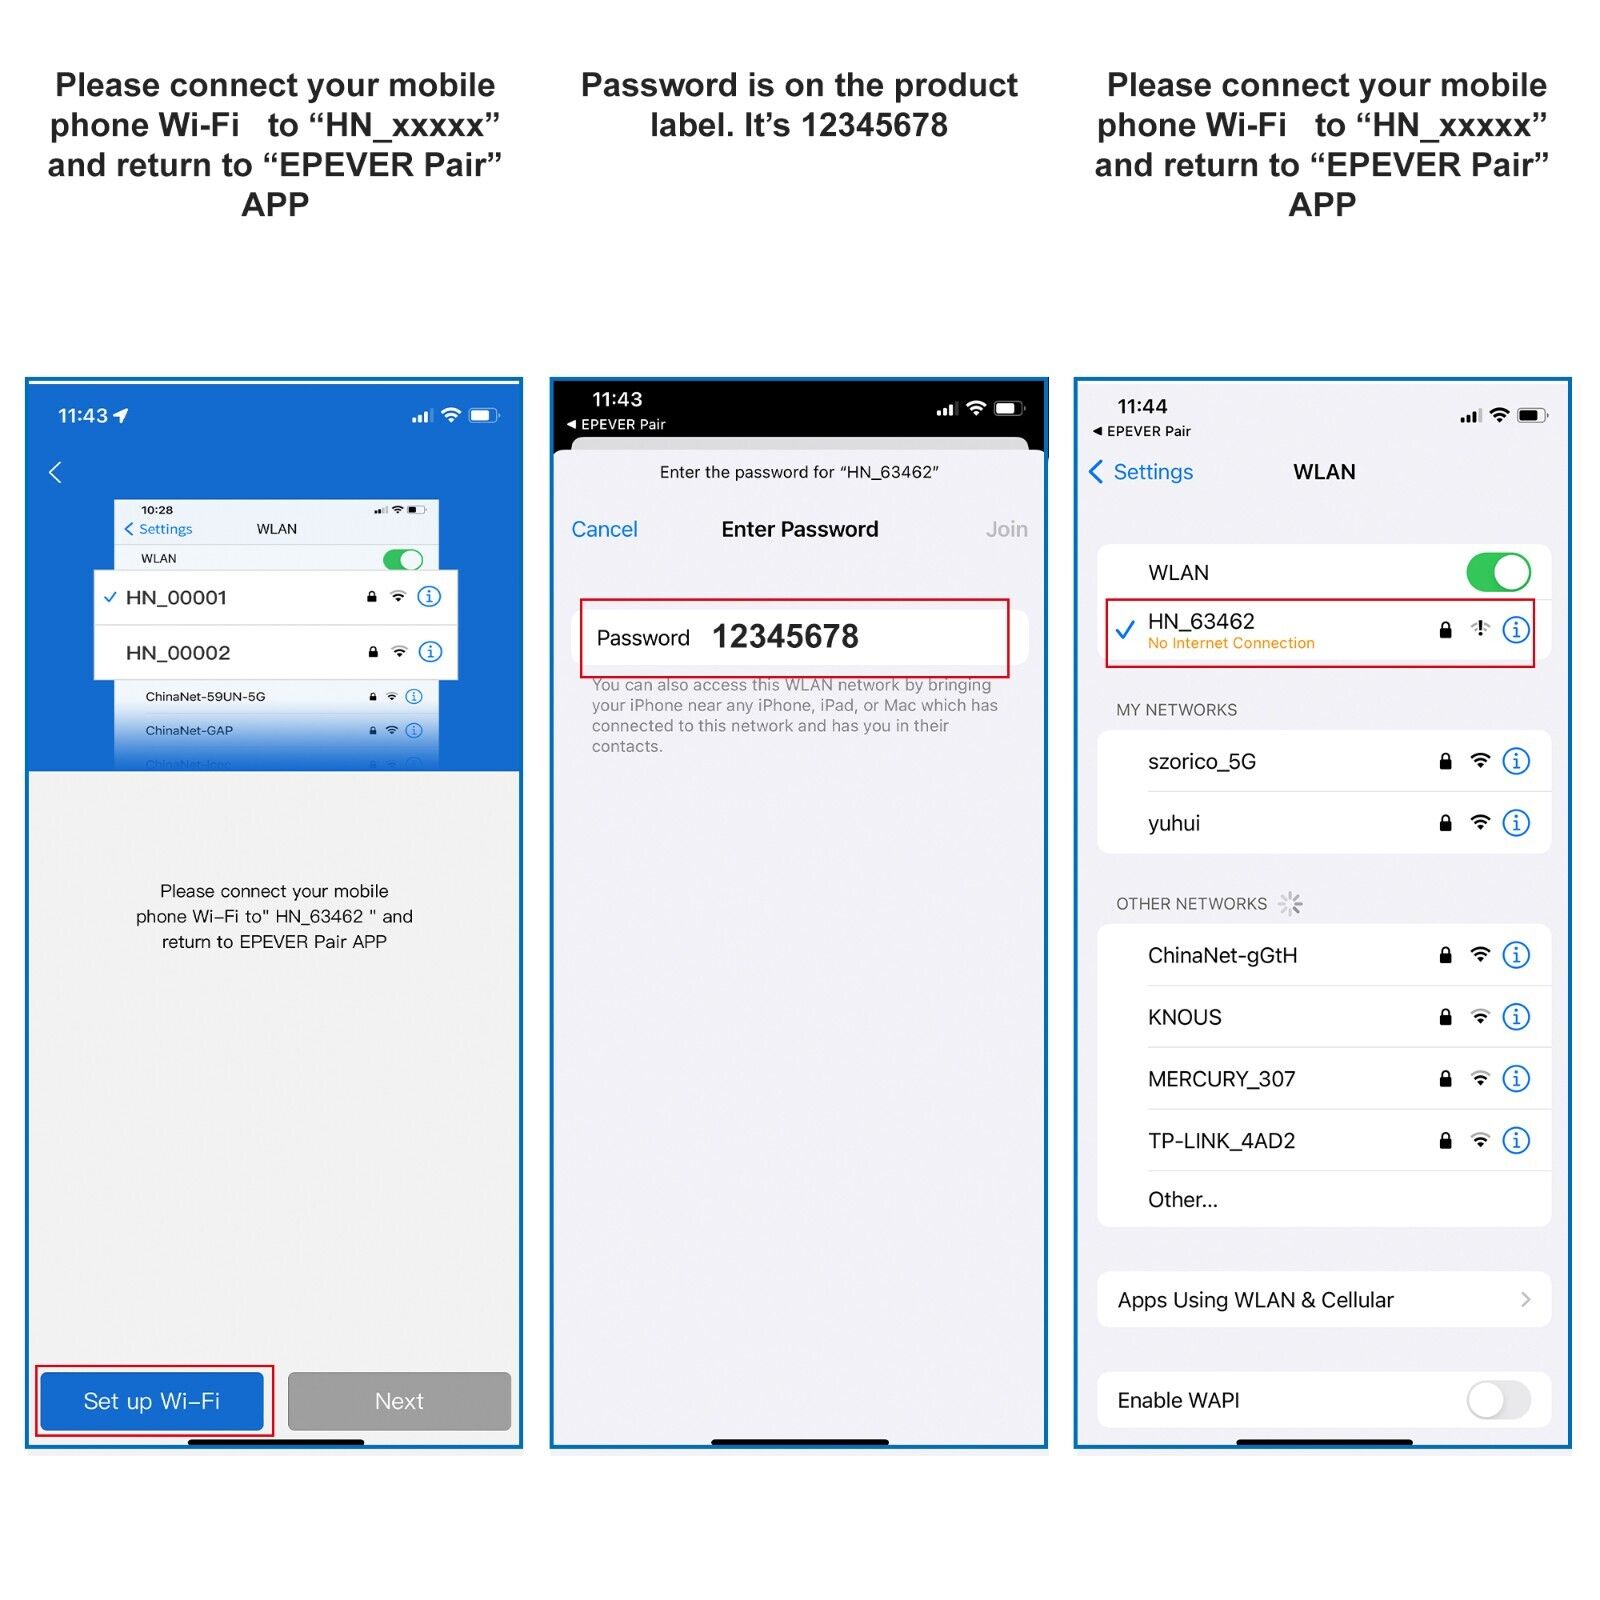
Please connect your mobile phone Wi-Fi to “HN_xxxxx” and return to “EPEVER Pair” APP.
Step 11:
Password is on the product label. It’s
12345678
Step 12:
Please connect your mobile phone Wi-Fi to “HN_xxxxx” and return to “EPEVER Pair” APP.
Step 13:
After connecting the device, click “Next” and go on.
Step 14:
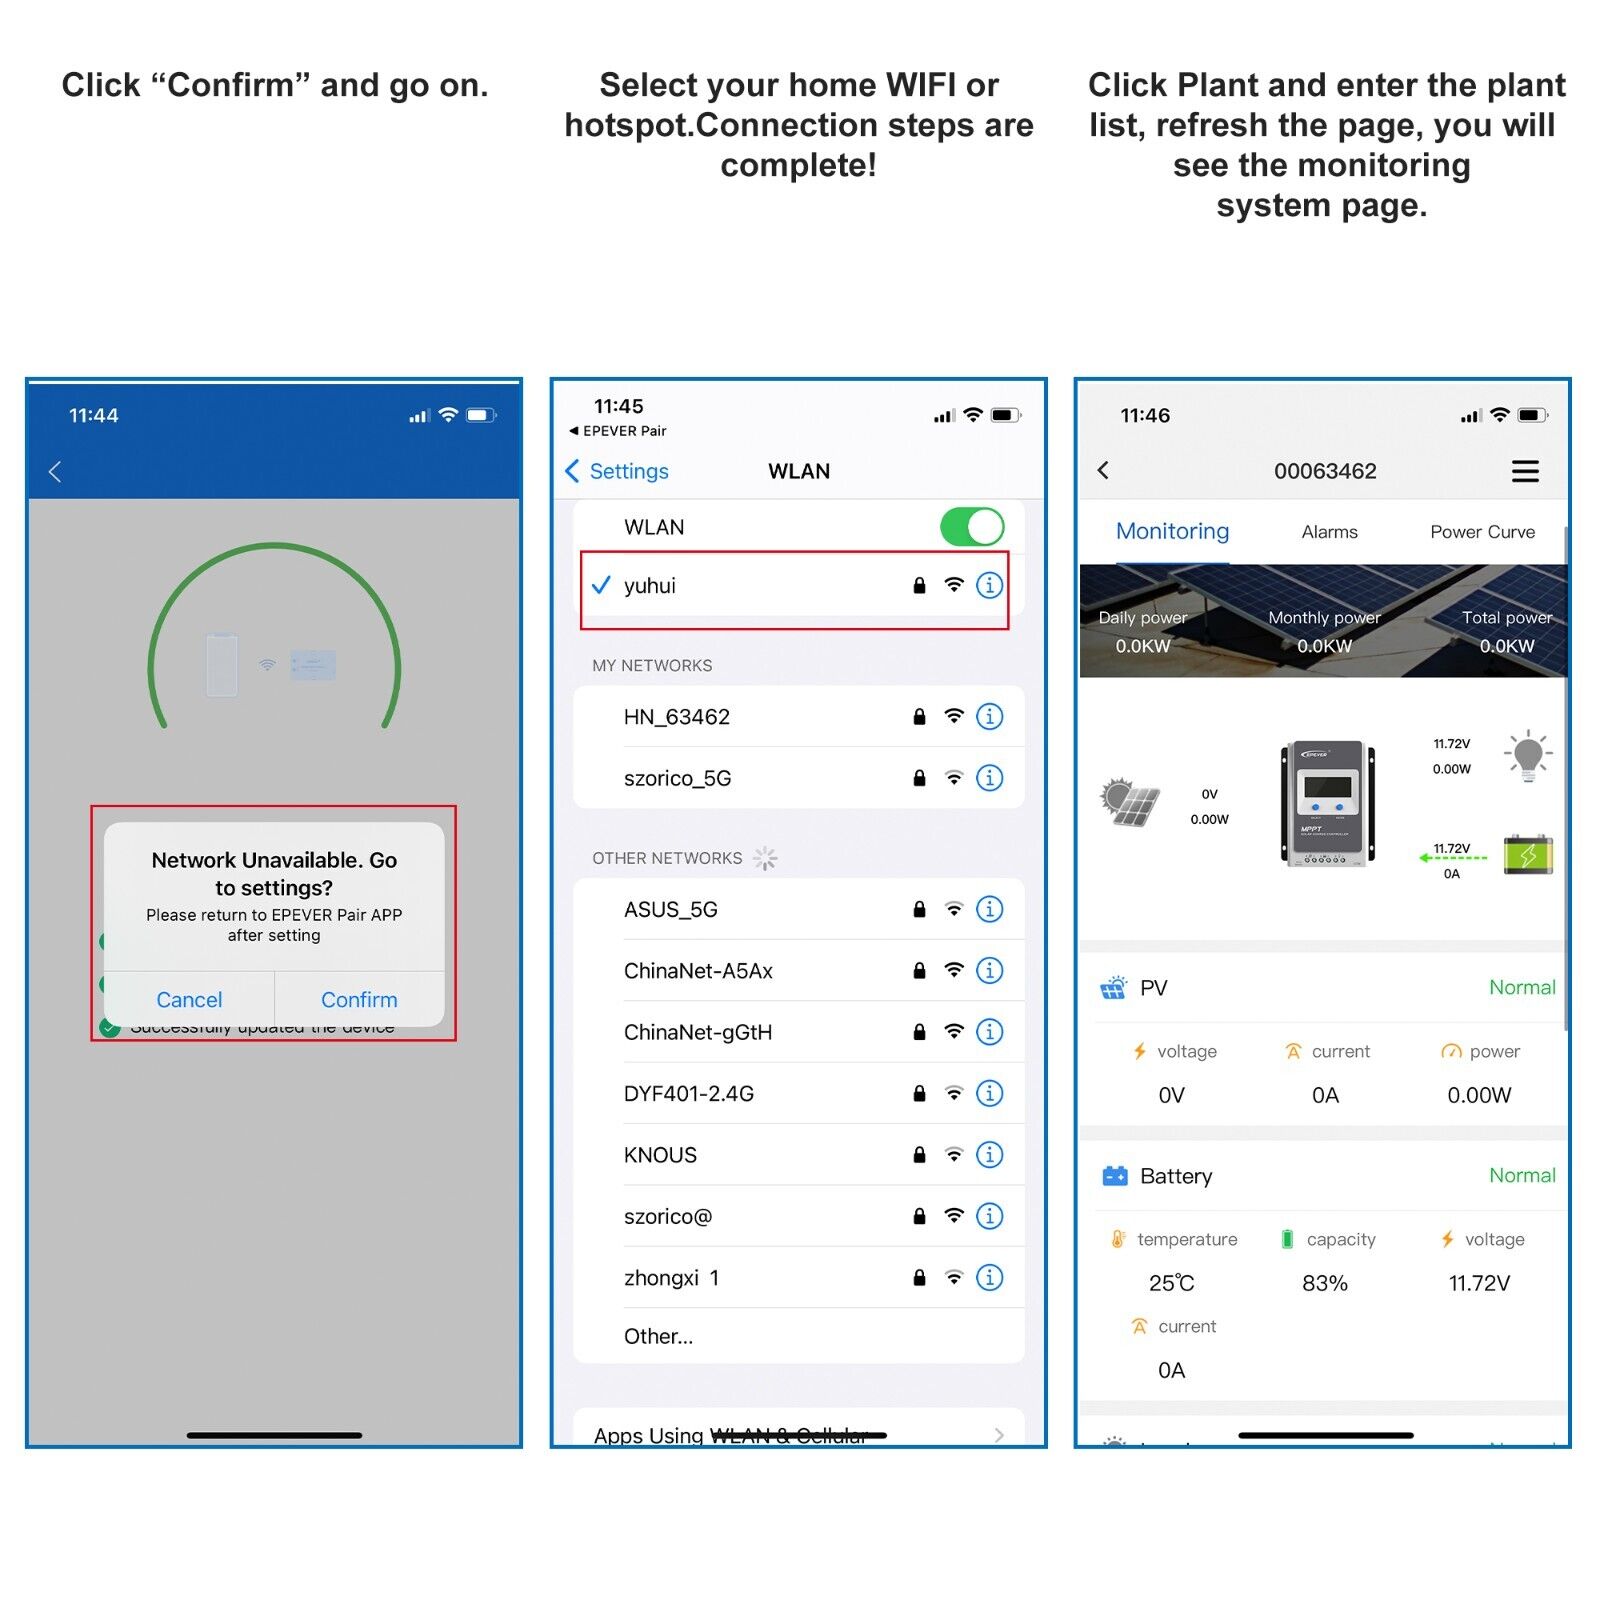
Click “Confirm” and go on.
Step 15:
Select your home WIFI or hotspot.Connection steps are complete!
Step 16:
Click Plant and enter the plant list. refresh the page, you will see the monitoring system page.
If you want to use the WiFi to Cloud , 2.4G WiFi network is a must.please contact and provide your deivces RTU ID and SSID number to vendor first , so we could active and re-active your devices . thanks
Tutorial video under product listing may help you operate the ebox device better ( Some steps will upgrade as the APP updrade ), if you need more nhelp,feel free to contact seller technical support
